Very exciting things are happening so I'll try to keep this email brief. Let's get straight into the highlights for this week:
The end-to-end creature workshop is coming sooner than expected!
A new piece from this month's 3DSnippets (lots of fun with FiberMesh)
Tip of the week: Thick skin and scales
New youtube video coming up... (including my custom ZBrush UI)
Cactus pack?
The end-to-ed ZBrush Creature Workshop
For the past few weeks, I've been mentioning a brand new workshop that I'm developing... well, most of the planning is nearly ready and I'm working on a very cool example to showcase what the workshop would be like. This is just a sneak peek of what's coming but I couldn't keep it to myself any longer haha:
The workshop will cover everything from concept and ideation, to sculpting, detailing, texturing (polypaint) and rendering and will go for 5 days. I'm aiming to have the registration page ready in a couple of weeks so I'll keep you posted. This is going to be a lot of fun!
3D Snippets from April
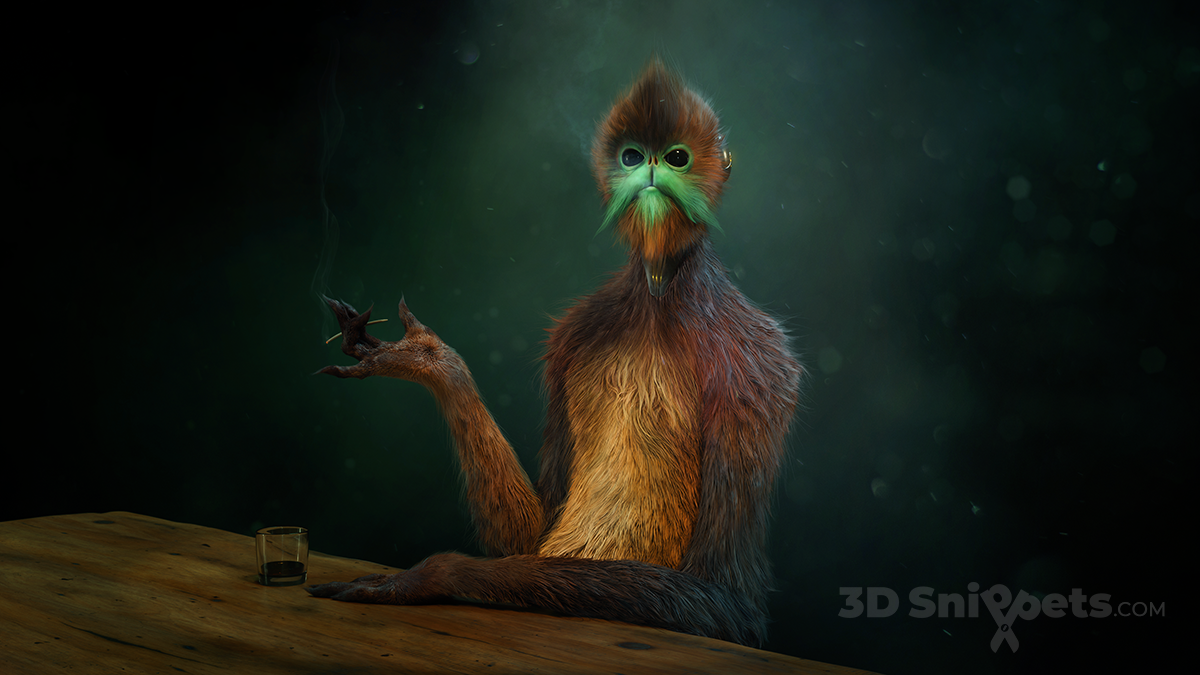
Another cool update I wanted to share with you is the new piece that I created for my 3DSnippets project. We aim to create a polished piece every month and try to focus on a specific software or feature... The last month of April was all about FiberMesh and this is the creature I came up with:
The whole thing was sculpted and 'groomed' in ZBrush and I did a 'hack' to render the Fibers in Marmoset playing with the shaders a bit... the rest is compositing in Photoshop as usual.
We are now in the process of locking in the project ideas for this month, so if you are interested and want to jump on board from the beginning of a new project, check out 3Dsnippets.com for more info!
Thick skin and scales
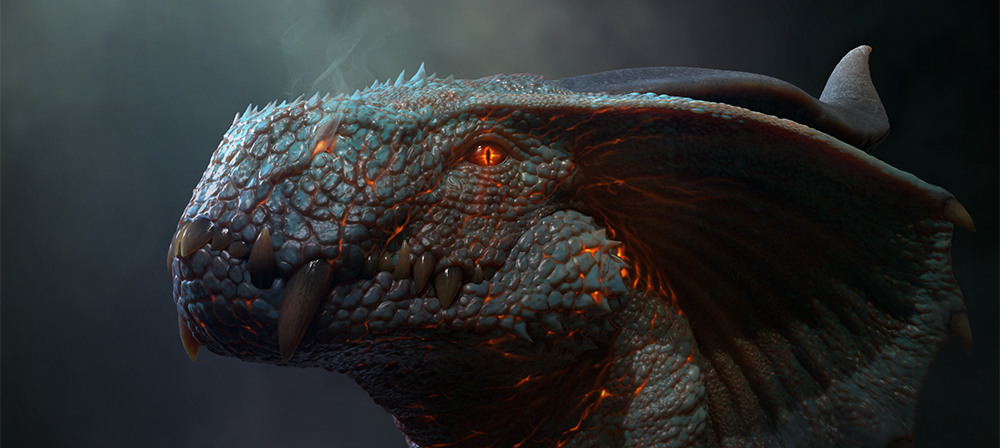
a few days ago a shared on my Instagram the concept of a Dragon that I polished from an older sketch and it got some interest so I thought I share some handy tips that I used to create the skin pattern and scales in the concept of the dragon.
Basically, the whole trick is using the Thick Skin feature to limit the 'reach' or depth of the details in the skin... here is a step by step:
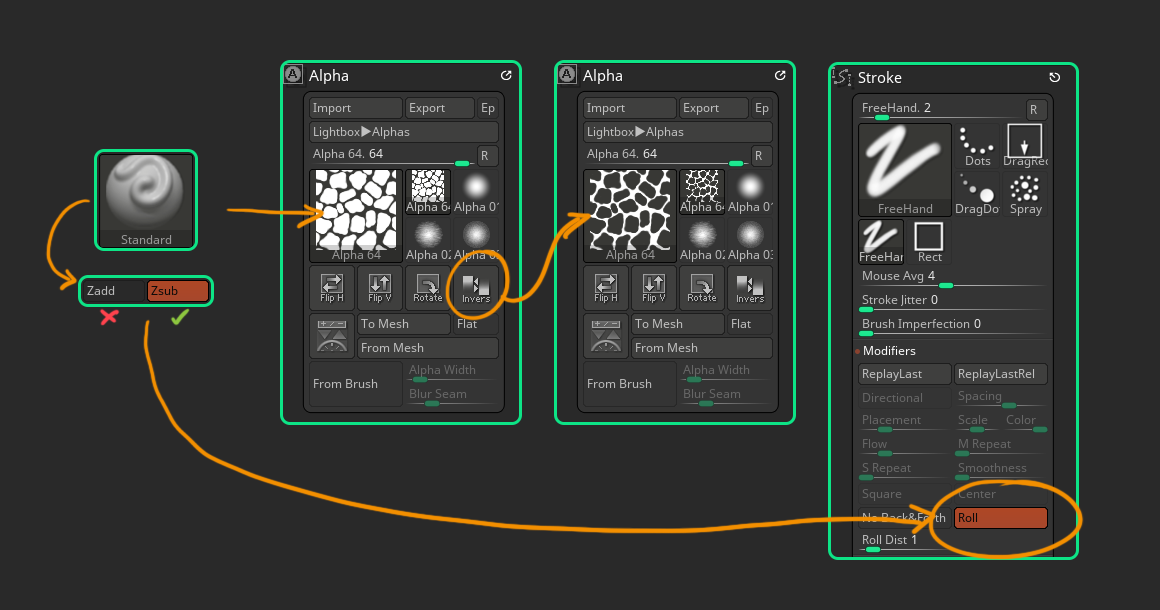
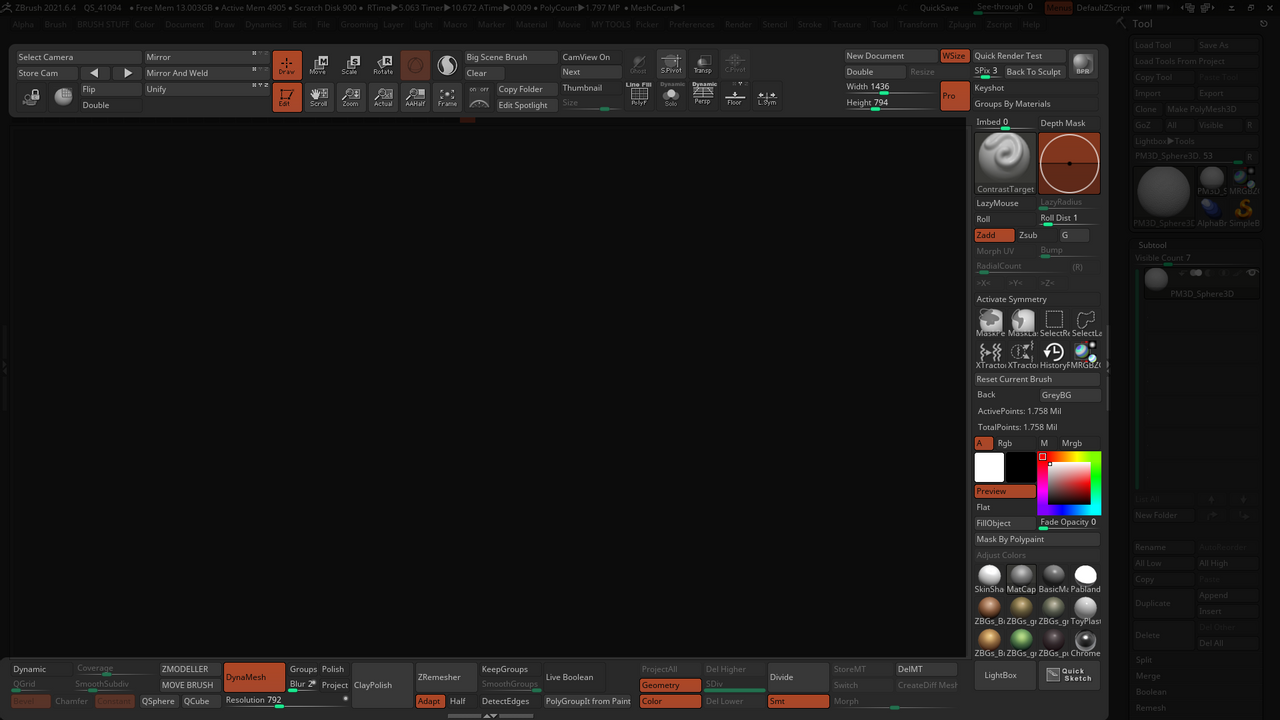
The first step is to tweak the standard brush to create the 'scales' pattern... so select the Standard brush, turn off ZAdd and enable ZSub. From the Alpha Palette, select the Alpha 64 and invert it. This alpha is tileable so we are going enable the 'Roll' switch in the Stroke palette > Modifiers.
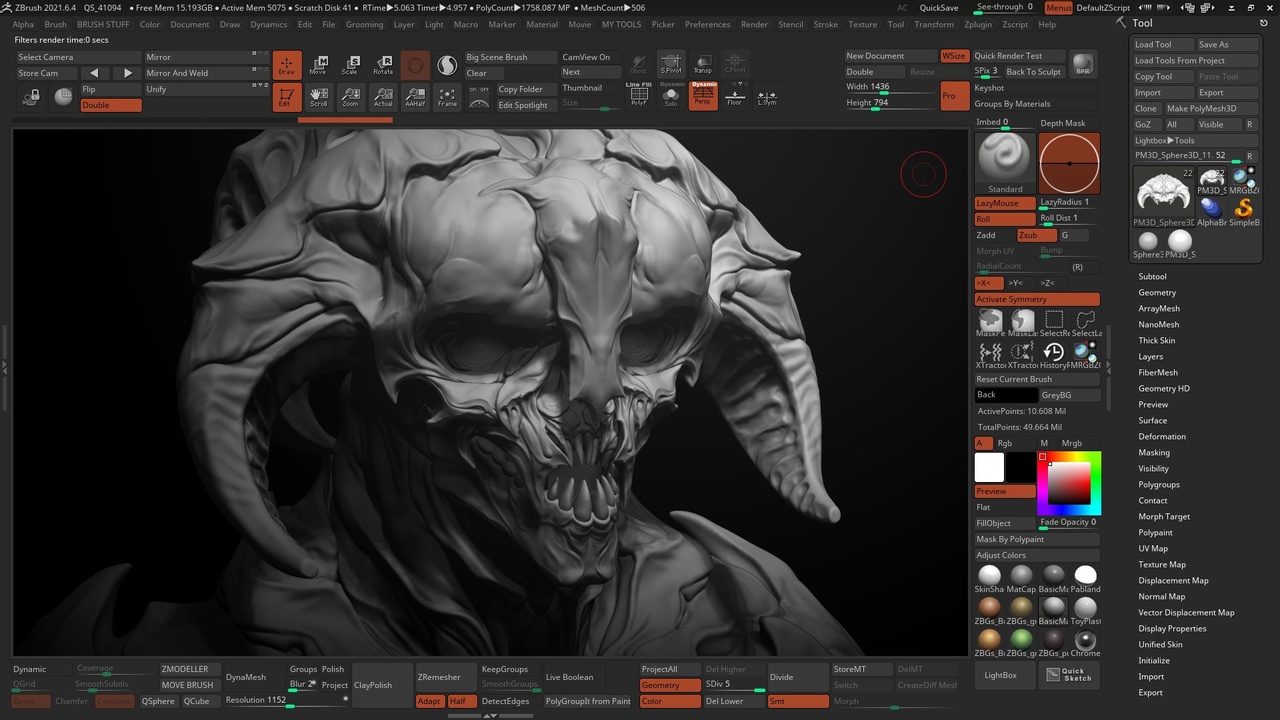
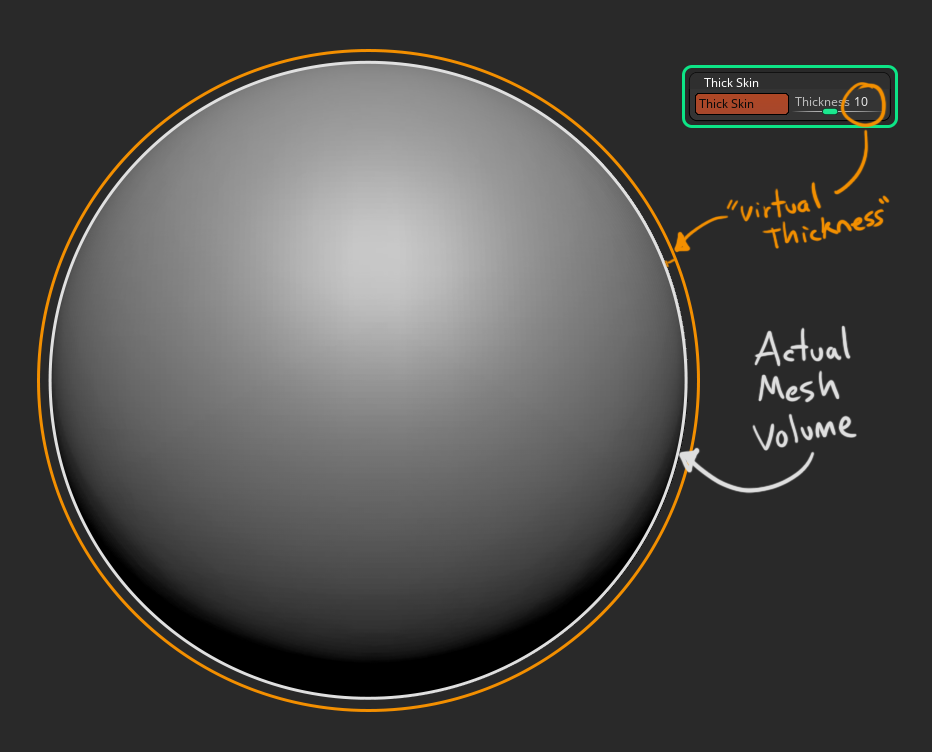
once you have your brush ready (and obviously you can use any brush with this technique), we need to setup the mesh you want to apply the pattern to have the thickness you want. So from the 'Thick Skin' subpalette (from the tool palette), enable the switch and give the slider a value (in this example I used '10' - This is basically how you can determine the thickness of the pattern):
Now, the cool thing about thick skin is that it works both ways... so by setting the slider to '10', you have a virtual thickness of +10 and -10 from the actual volume of your mesh... this is why we set the brush to 'Zsub' in the first place.
And... because we also have a tileable alpha and the 'Roll' enable, then we can just start drawing some strokes into the mesh to create the pattern we want. I'd also suggest saving a Morph Target before starting with the patter so you can always 'go back to refine certain areas of the mesh.
The next step is just to tidy up the whole process... we can use the Deformation subpalette (from the tool palette), and inflate the added details to close the gap between the scales a bit. I also like to add a bit of noise to give some roughness to the surface and maybe use the 'Polish Crisp Edges' to soften things a bit (up to you).
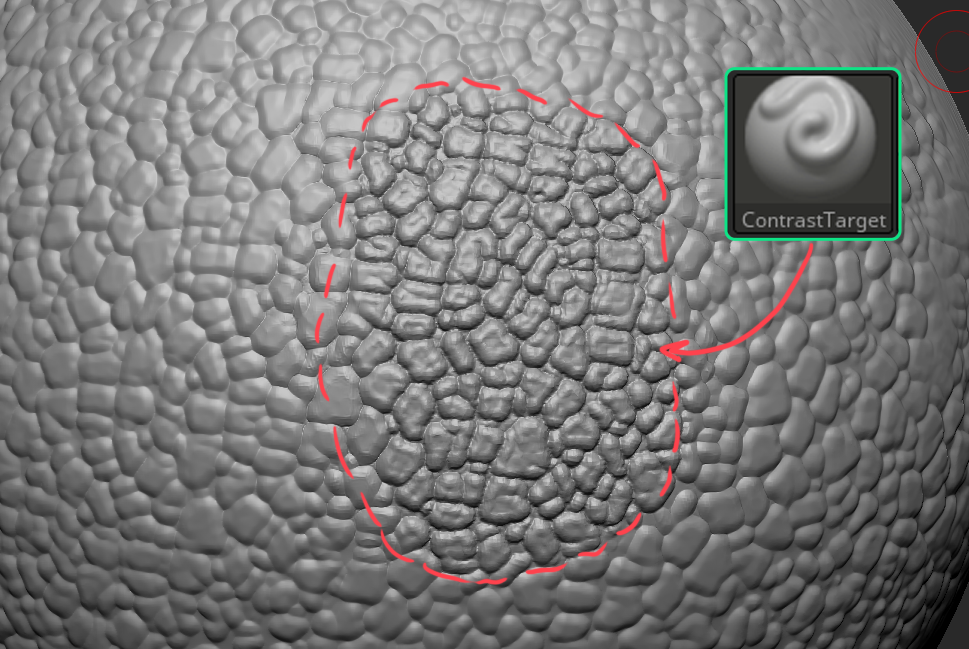
That's pretty much it. Here is a bonus tip: You can use the 'ContrastTarget' brush to manually enhance the contract of some areas in the model:
New tutorial coming up...
One of the most frequently asked questions that I get is about my custom ZBrush UI... so I'm currently working on a new tutorial for my YouTube channel, where I'll be showing you some beginner and advanced tips to customise your UIs with purpose. Also, I'll be sharing my own UI in case you want to grab it ;)
If you haven't, go ahead and subscribe to the YouTube channel so you get notified when the video is up and I appreciate you helping me spread the word... The channel is growing but every little helps and allows me to continue producing more content for it! :D
Cactus reference pack???
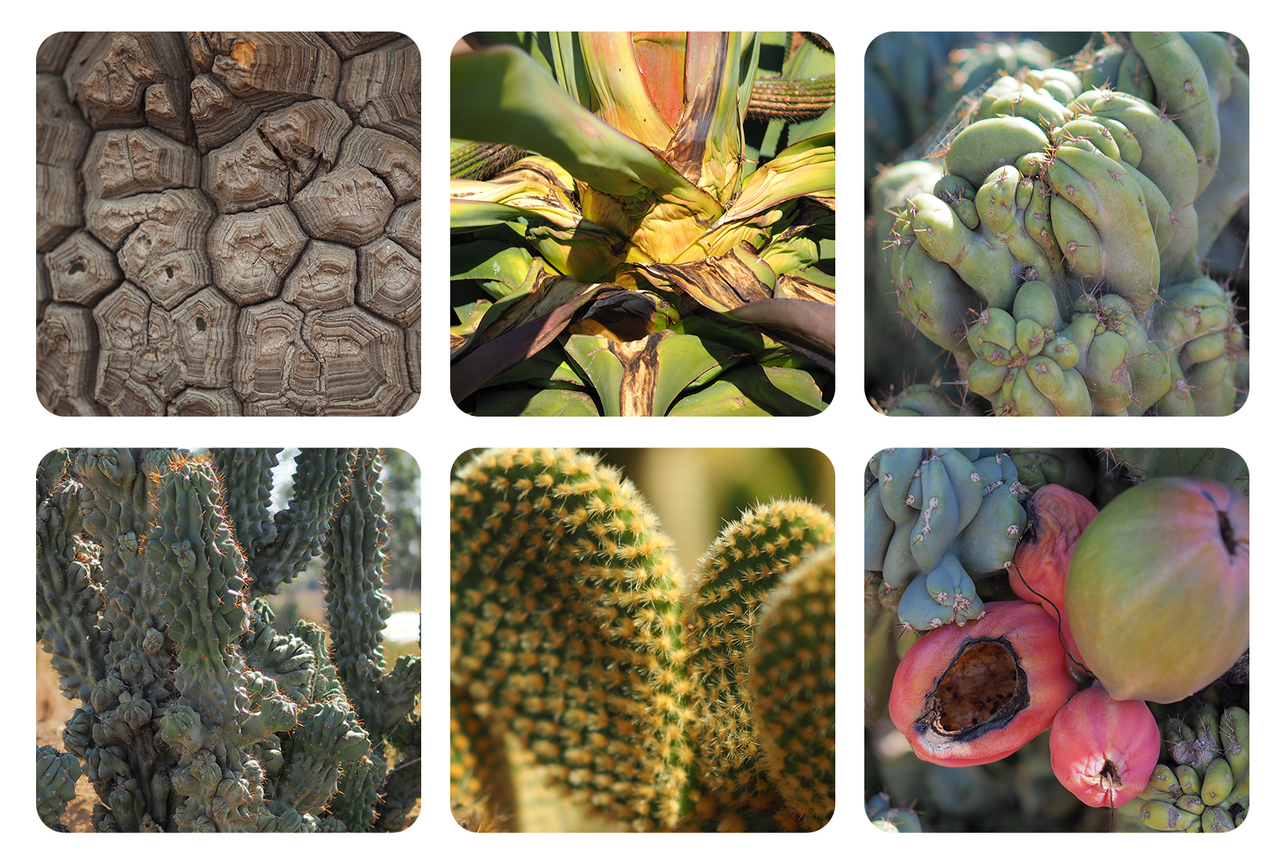
this is more of a question... I went to a place that had all sorts of REALLY COOL and weird cacti. I took heaps of photos that I think are absolutely fantastic for creature reference or purely as an inspiration. So the question is... Would you be interested in a pack of references with a bunch of high-res photos like this (more than 250):
Alright! that's about it. I hope you find these tips useful and I'll see you next week!
Cheers, Pablo M.
In other news...
In case you missed it...
Last week I shared a new video tutorial covering the process of creating your own custom brushes in ZBrush. I had to re-upload the video and the link changed so here it is again, in case you missed it.
In case you missed it...
Last week I shared a new video tutorial covering the process of creating your own custom brushes in ZBrush. I had to re-upload the video and the link changed so here it is again, in case you missed it.
UZG Challenge is finished!
The #UZGchallenge is finished and there are some really cool entries! I'll be announcing the winner this week!
UZG Challenge is finished!
The #UZGchallenge is finished and there are some really cool entries! I'll be announcing the winner this week!