Hey Richard, how’s it going? I hope you had a great weekend. Today I have some pretty cool news, a brand new tutorial on YouTube and a tip on how to easily blockout clothing accessories in ZBrush! Let’s get to it…
Creating the handle of a Japanese sword
There is a new video tutorial on the YouTube channel based on a quick tip I shared by email a couple of weeks ago. So in case you missed that tip in the email, the video tutorial covers the whole process of how create the handle of a Japanese sword (the Tsuka of the Katana).
Hopefully, this video will clarify a bit of the process and help you create intricate woven patterns. If you make something cool with the technique please let me know, I’d love to see it!
BIG NEWS!
The release of the new ZBrushGuides website (v3.0) is around the corner! I’m preparing a couple of videos to walk you through the changes and showcase the new website but everything else is pretty much ready. I will share a little teaser video on YouTube so if you are subscribed to the channel, you’ll get the notification once I make it public ;)
This is going to make it so much easier for you to find what you are looking for in one place and for me to share content more often! I’m super excited to see what you think about the new platform.
Keep an eye out, I’ll send you a dedicated email to let you know when the new version is live!
Creating a glove in ZBrush
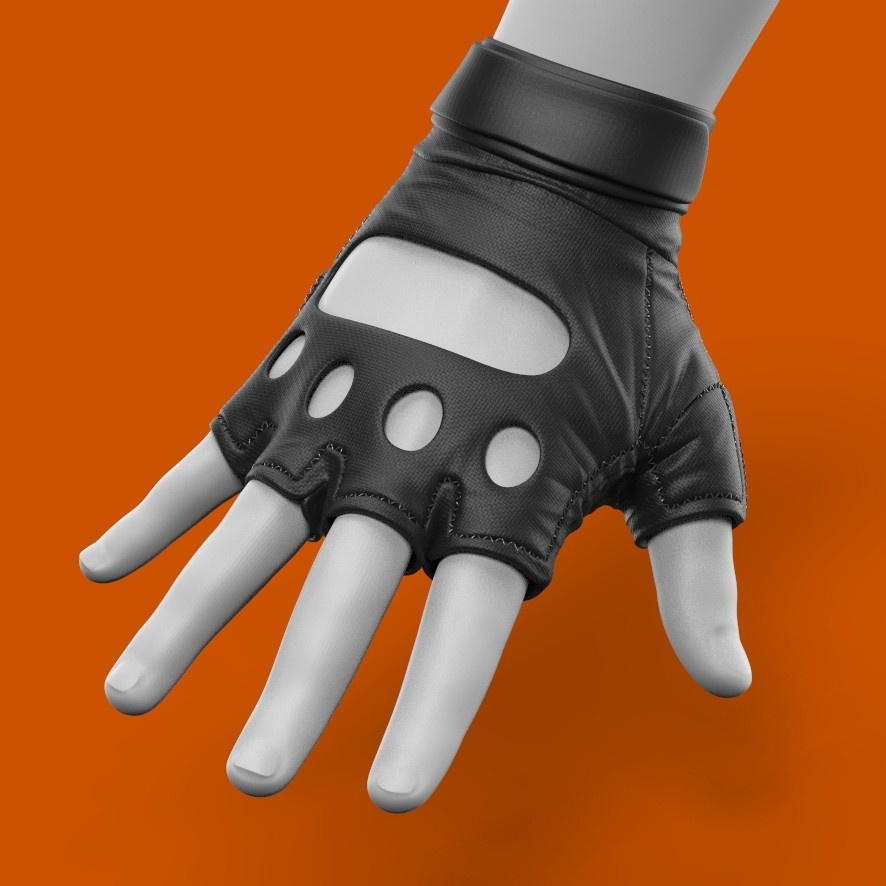
So for today’s tip, I thought I share a simple but effective technique to produce clothing accessories like a glove or a boot that will conform to the volumes of the body. Here is the render of the quick blockout of the glove we are going to make:
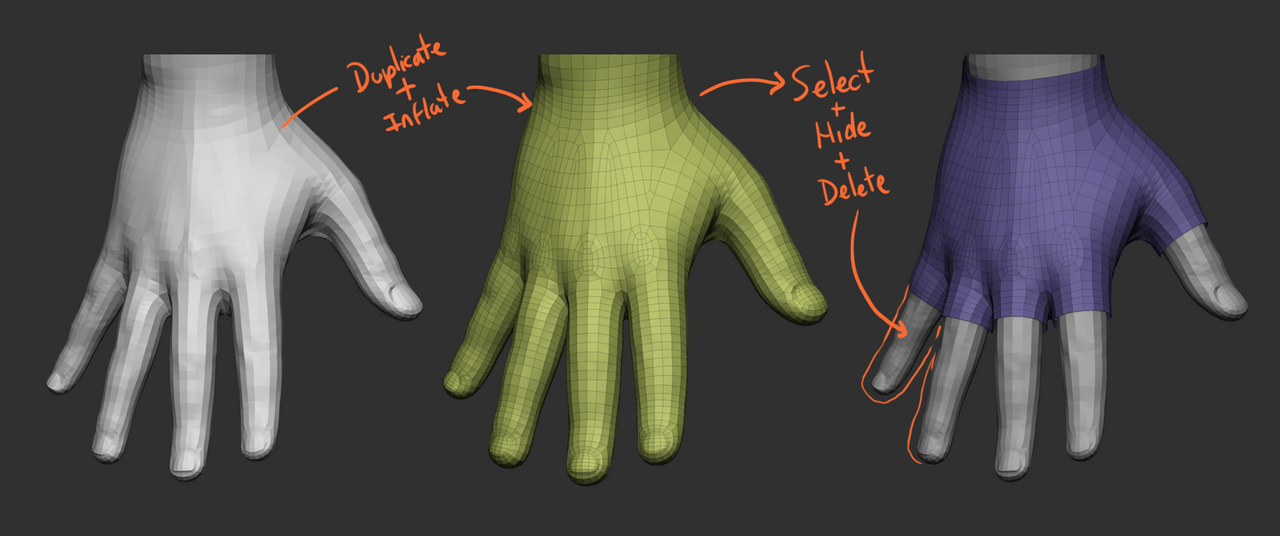
So the first thing is obviously to create the geometry for the accessory you want. In my case, I took the base mesh I had for the hand, duplicated it, inflated it and removed the fingers. If you want a glove with the fingers, you can just inflate it and move on to the next step…
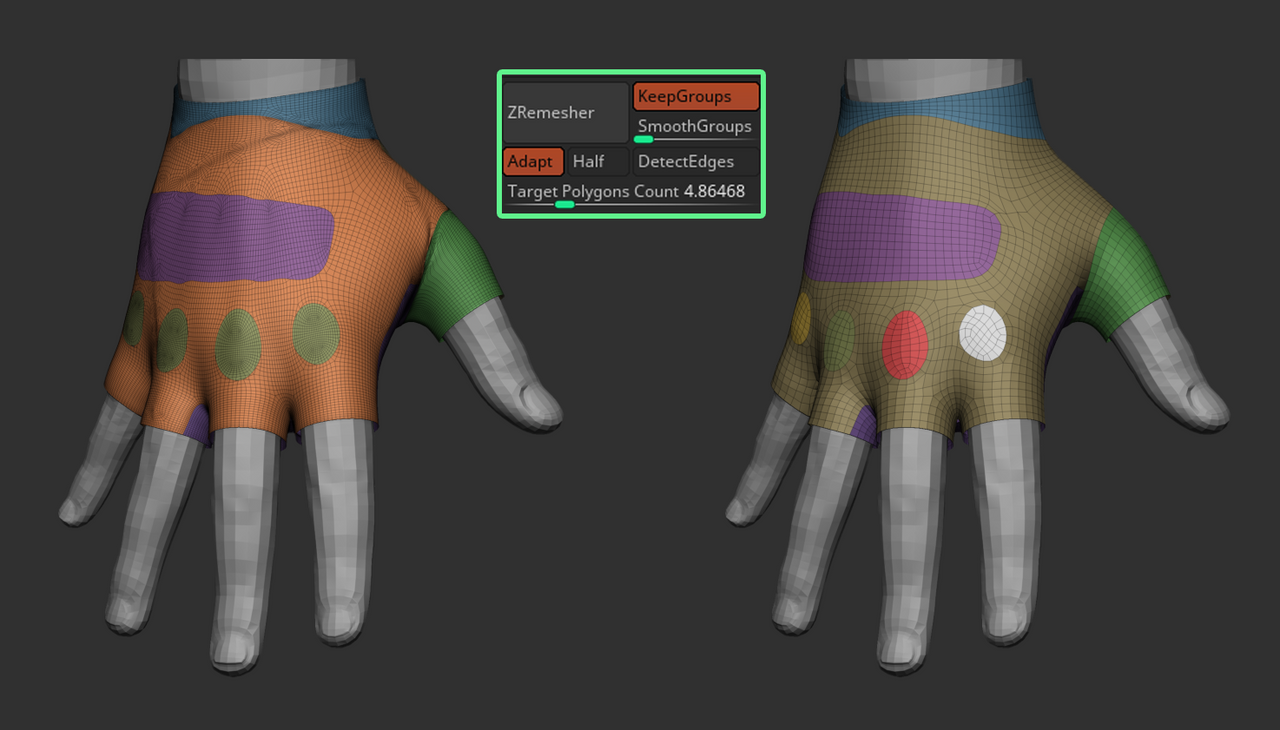
Because I wanted something a bit more complex, I subdivided the mesh and used the slice curve brush to define some new areas for polygroups. The slice curve brush is pretty handy to quickly establish new clean cuts between polygroups but if you use masking or selection tools, you can always use the ‘Polish by Groups’ sliders from the deformation palette.
With the polygroups ready, you can run a ZRemesher process with ‘Keep groups’ enabled and produce a cleaner geometry:
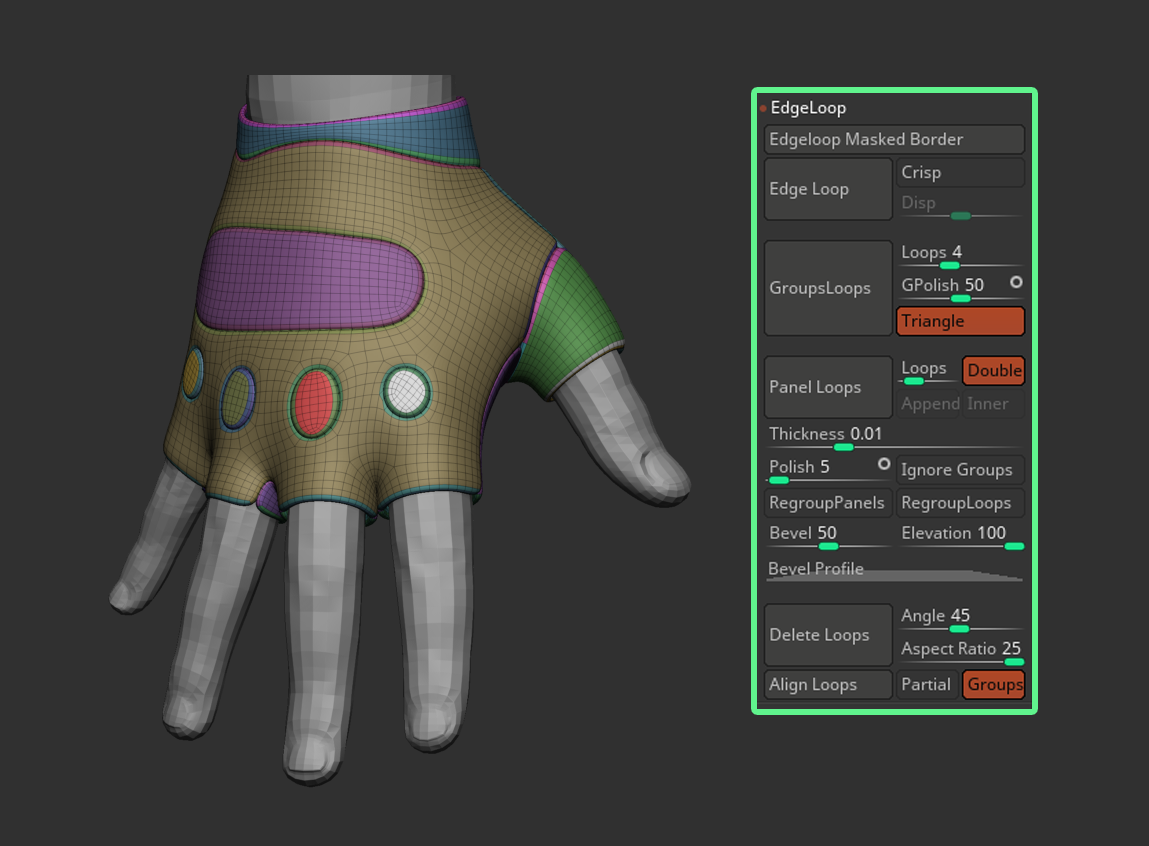
The cool thing about this process of creating custom polygroups and then a clean topology out of those polygroups is to then use the Panel Loops button to split up all the polygroups with thickness. This is a one-click operation and I used the default settings:
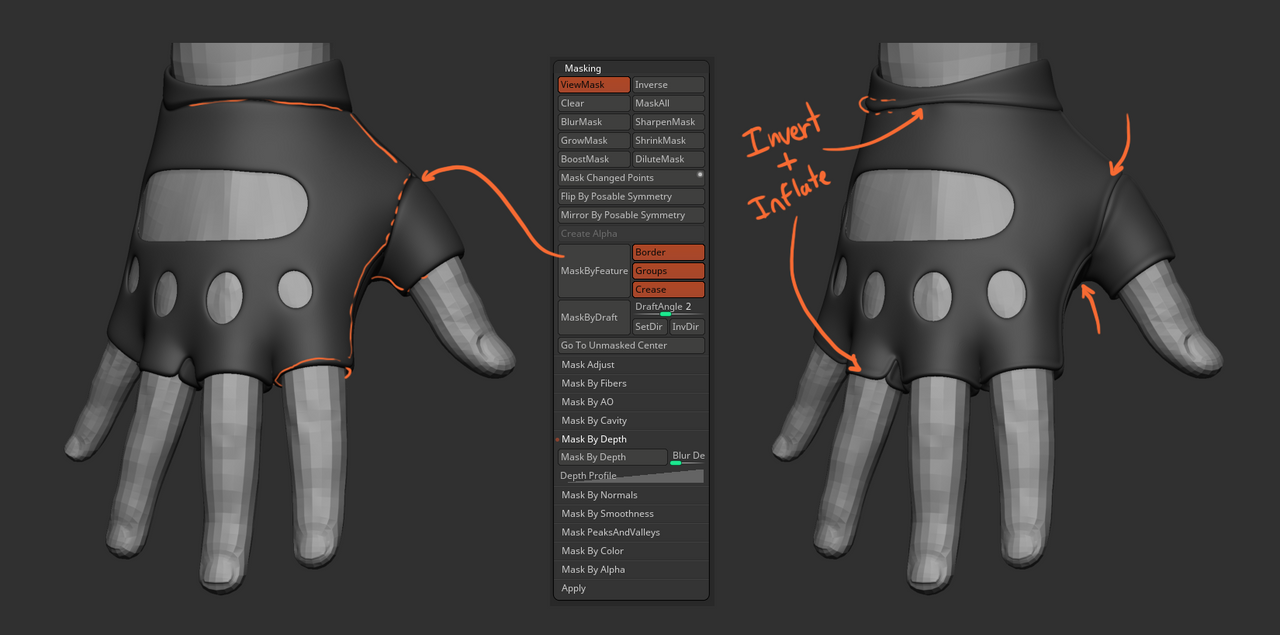
Now we have each polygroup as a separate piece and with thickness. Another cool thing you can do is create polygroups for just the border of each piece or use the ‘MaskByFeature’ button from the masking palette to mask out the edges. I used this feature to protect the glove and inflate the edges slightly:
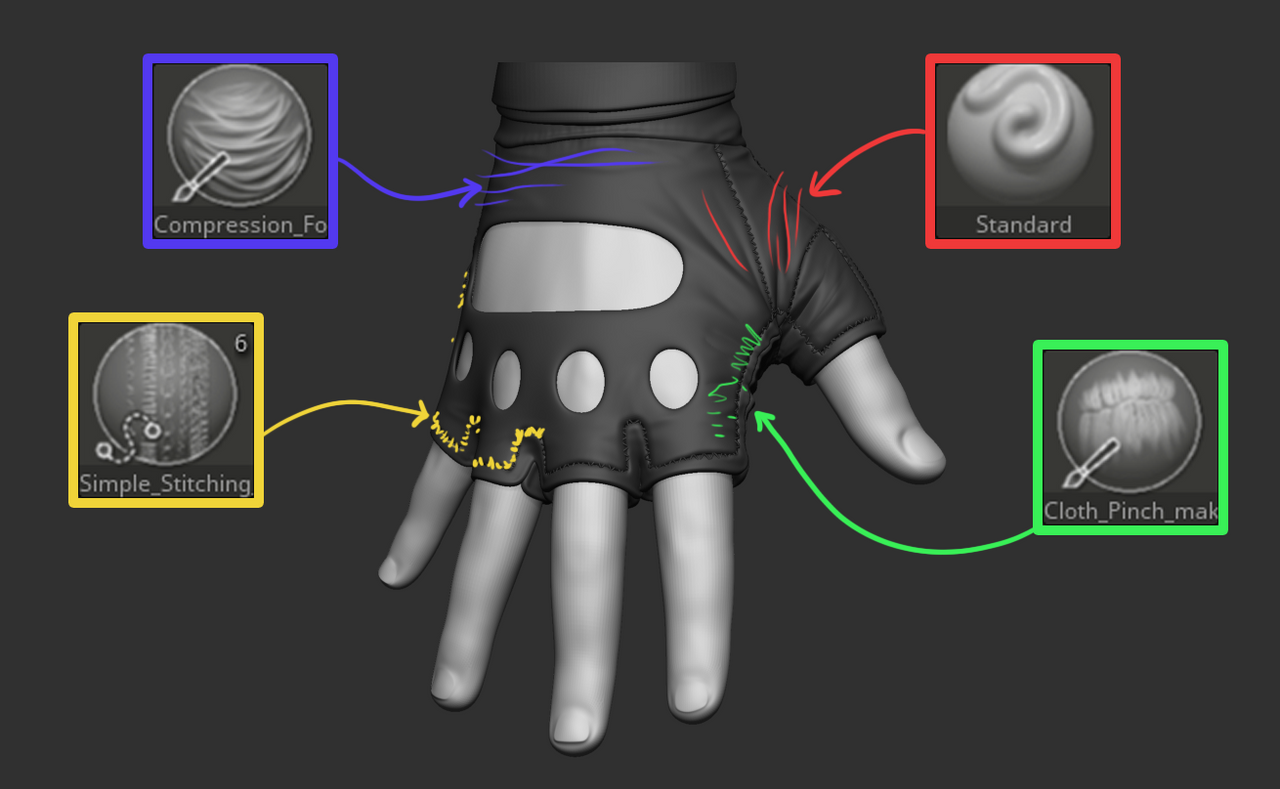
At this point, you should have a clean mesh with polygroups so you can subdivide the mesh a bit (or apply Dynamic Subdivision if you have it on) and sculpt some details. I used the Dam Standard brush to cut additional ‘panels’ along the fingers and I used my custom clothes brush pack to add some compression folds, some writes along the seam and some tiny stitches.
To wrap up the glove, I duplicated a couple of polyloops around the wrist of the original base mesh and created the straps over the wrist of the glove. This is what I ended up with:
That’s it for today, I hope you find this tip useful and I’ll see you next week!
Cheers, Pablo M.
PS: I'm jumping on a #ZBrushLive session later today to continue working on the stylised prop we started a couple of weeks ago ;)