Hey Richard, hope you are having a great week so far. I don’t know if you’ve seen some of the new AI-generated videos popping up on the internet… they are pretty impressive (check this out). To tell you the truth, when I first saw the sci-fi trailer generated with AI, I was very impressed but at the same time, I felt somehow reassured that I’m still going to be relevant as a 3D artist haha. I mean I know that AI in our lives is kind of inevitable at this point and the AI models are just going to keep getting better…. but, there is really no depth and no ‘soul’ to the amazing graphics that are produced with AI. I feel everything ends up looking the same… Anyway, this is a topic for another day, haha, in this email I have a couple of cool updates and a mini-tutorial on sculpting stylised hair!
Lost creatures
Last month on my 3DSnippets project, I had a few suggestions on what topic to cover and most of them were around ‘hair and fur’ so I decided to learn a bit more about the Blender hair geometry nodes and see how I can incorporate them in my workflow.
Here is the final concept I created for another instalment on my ‘Lost Creature’ series (you can see other images and the lighting/compositing process on my ArtStation post here):
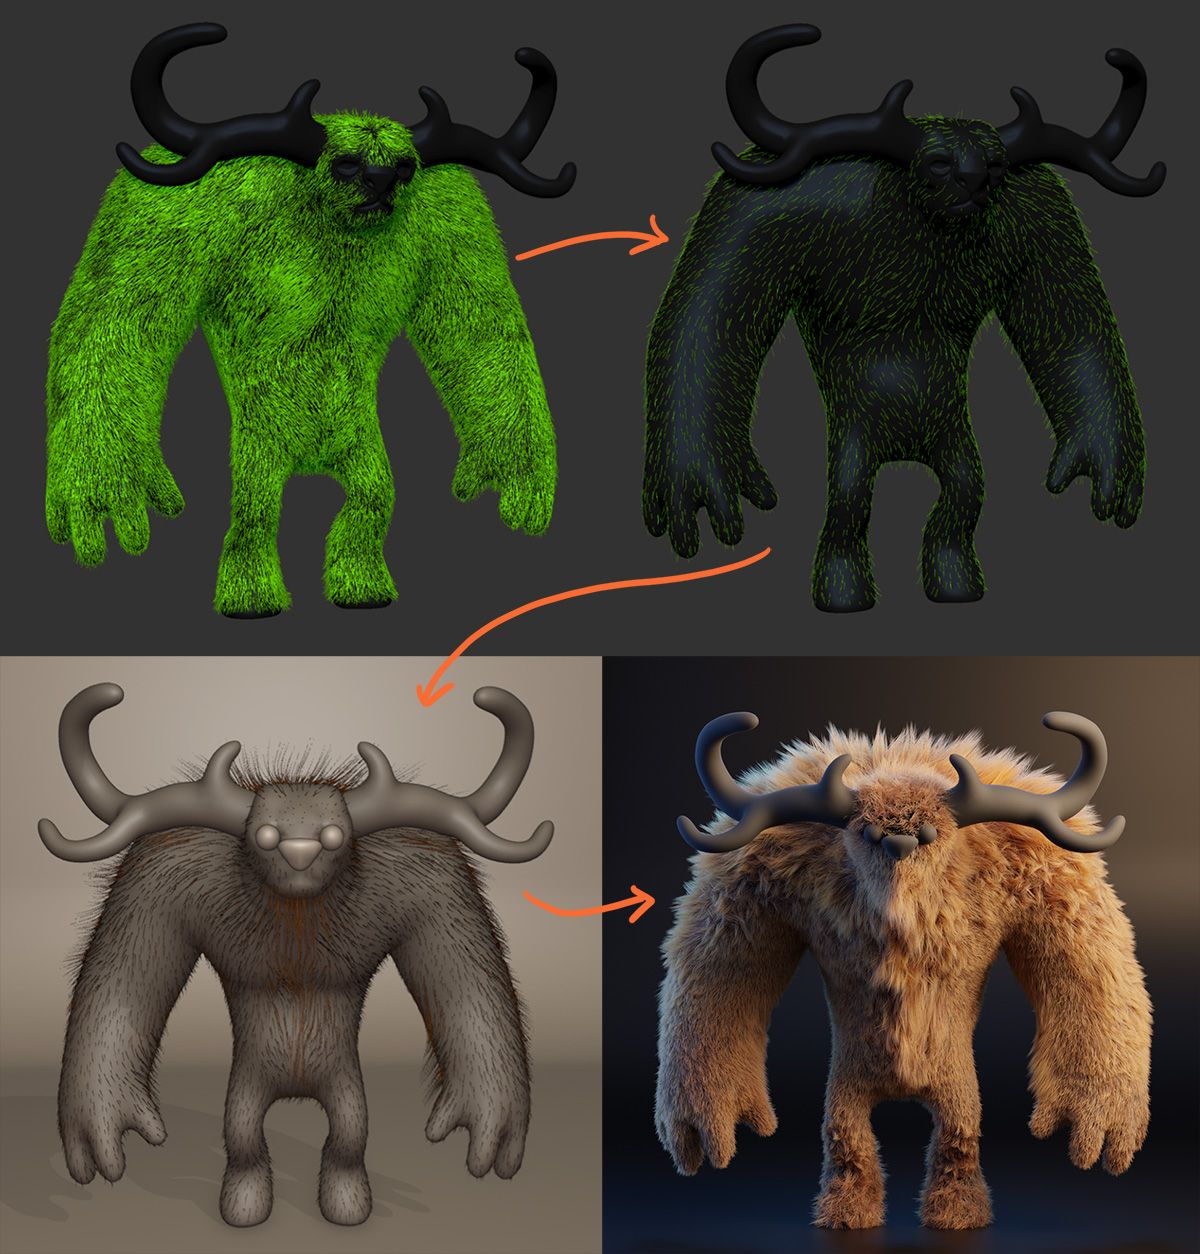
The concept sculpts and the base mesh was created in ZBrush and then rendered in Blender. I also did other tests involving FiberMesh that worked quite well… basically, you can do your grooming in ZBrush using FiberMesh and the ZBrush grooming brushes and then export the curves from ZBrush to guide the fur in Blender.
The process is rather simple and if you are familiar with FiberMesh grooming, you can just create the flow in ZBrush, export the curves and use Blender geometry nodes for hair to stylised the hair and give it some extra properties to make it look more convincing (noise, frizz, etc). Definitely worth trying ;)
ZBrush Summit 2023!
We’re just a couple of months away from the 10th anniversary of the ZBrush summit! - I’m excited to share that I’m going to be there in person this year and I’m really looking forward to connecting with other ZBrush artists.
Let me know if you are planning to go, it would be great to meet up and hang out in the summit. We have a dedicated channel for the summit in our Discord server, so you can chat with other people that are going to the summit… some people are organising shared accommodation as well to lower the costs ;)
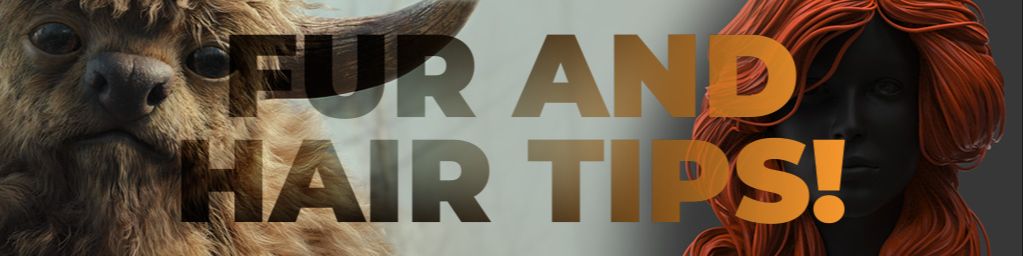
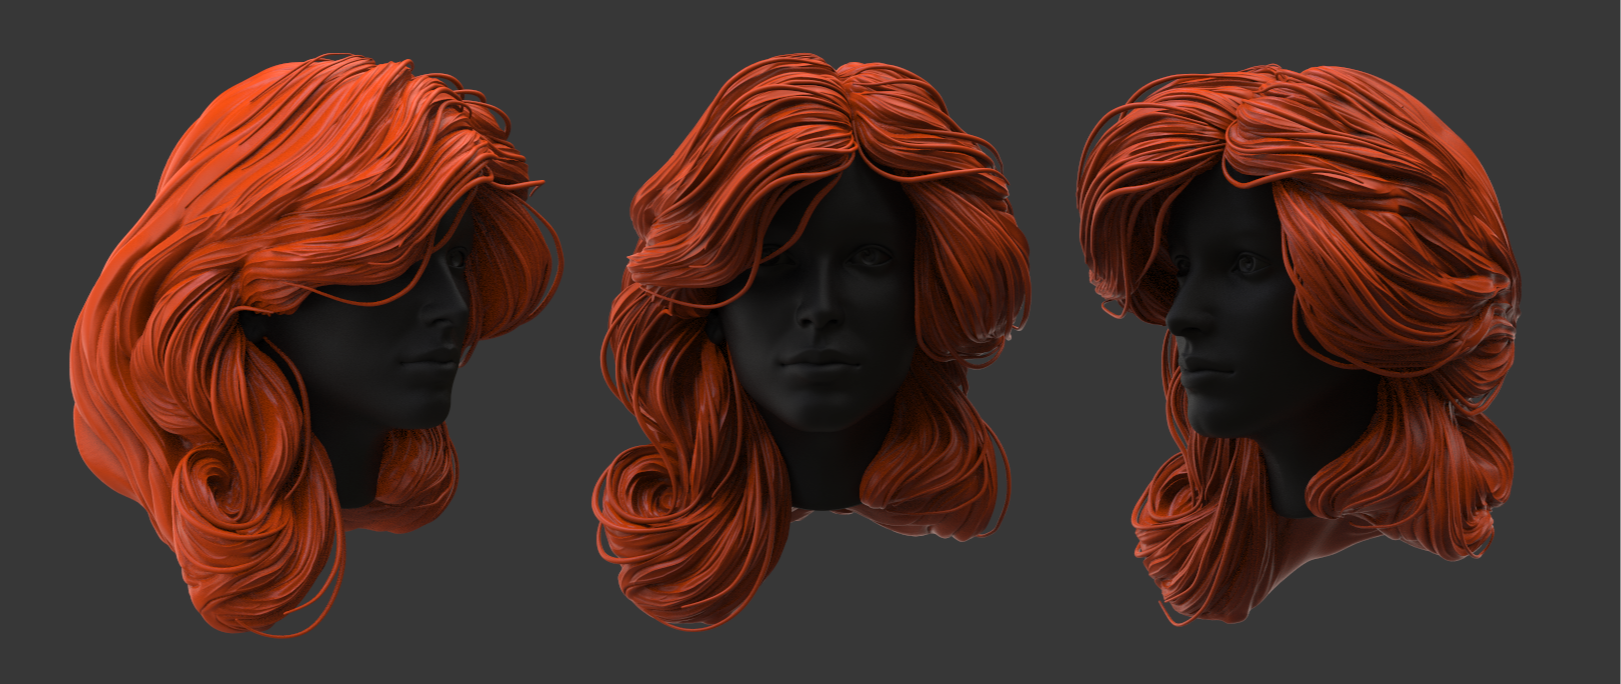
Stylised sculpted hair
For this week’s tip, I actually have a mini tutorial in response to a couple of questions I got last week about the use of my ‘hair sculpting brushes’ and the ‘general workflow to sculpt hair’… so I’m going to show how I would approach something like this:
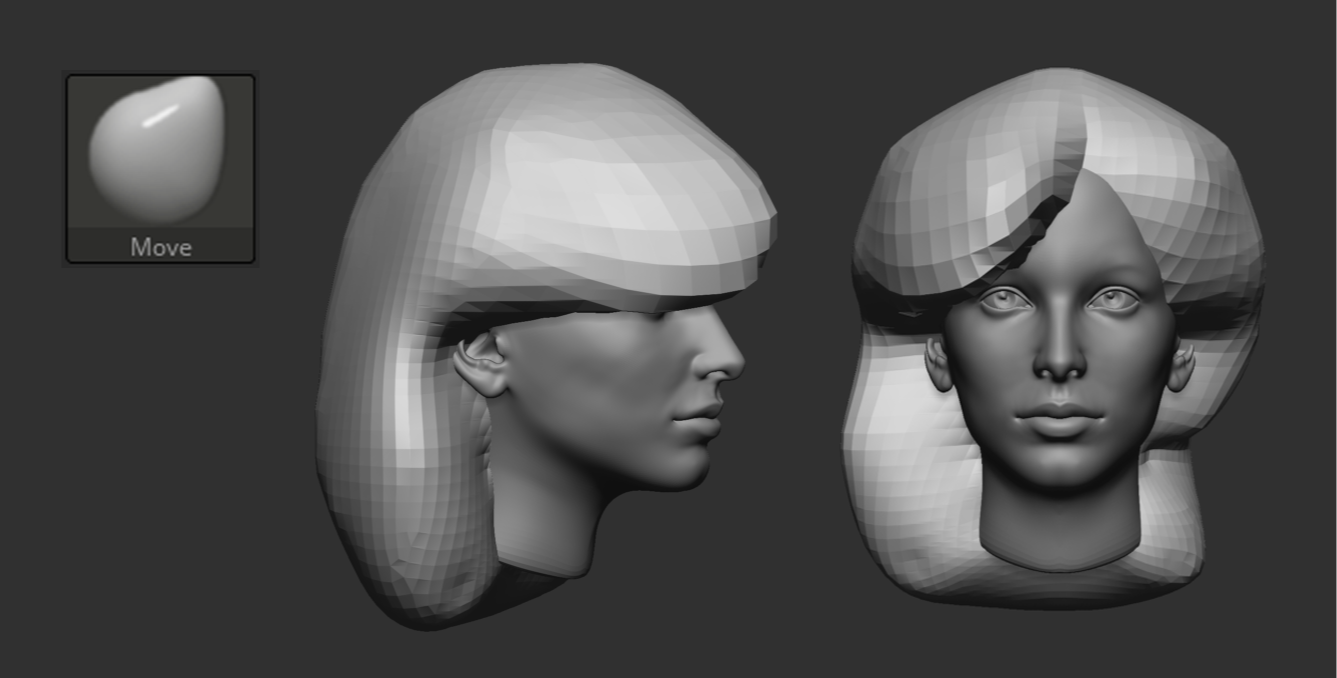
So the first thing for me is always the same… focus on the primary shapes and the main volumes. I start with a Dynamesh ‘blob’ with very lo resolution and I use the move brush to get something going. You can also use masking brushes to restrict the movement of the polygons a bit:
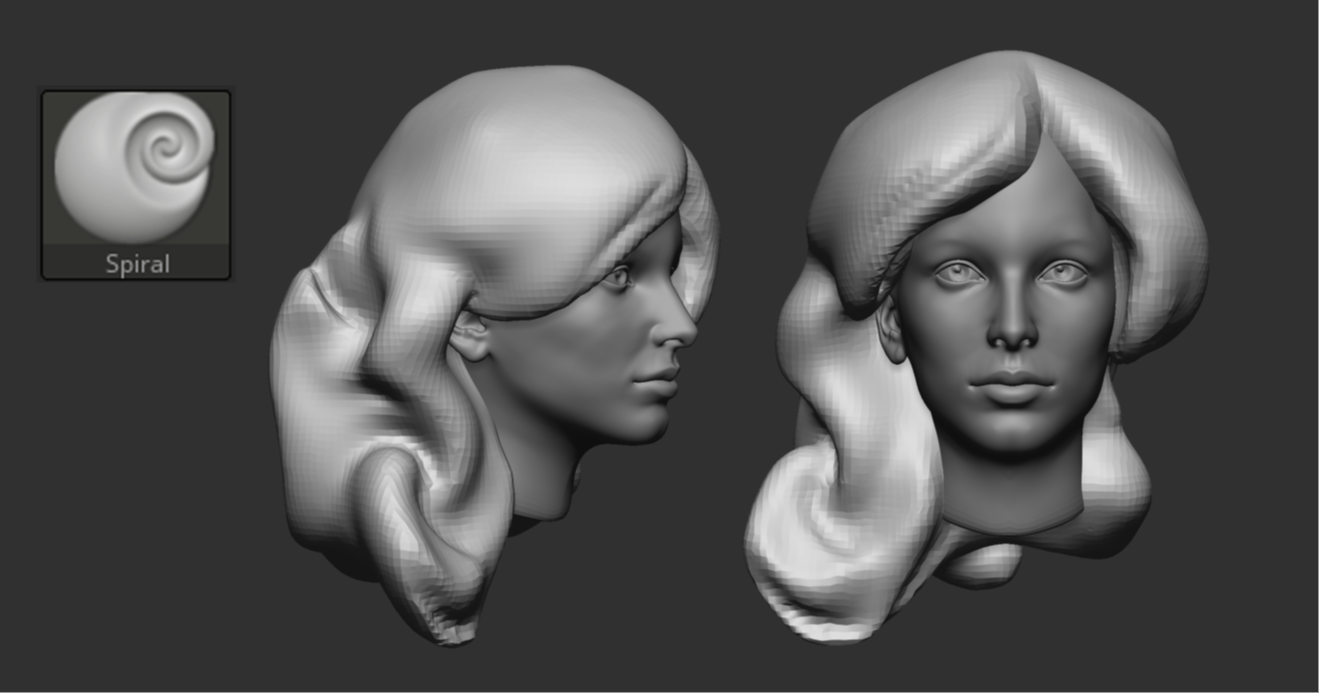
Something else you can use to block the hair and produce a more ‘organic’ feel to it, is the Spiral brush. If you use a tablet, don’t press too hard on your pen and you can actually change the directions of the spiral by holding the ‘Alt’ key to modify the effect.
This process is kind of an extension of the blocking process but can produce a nicer organic feel:
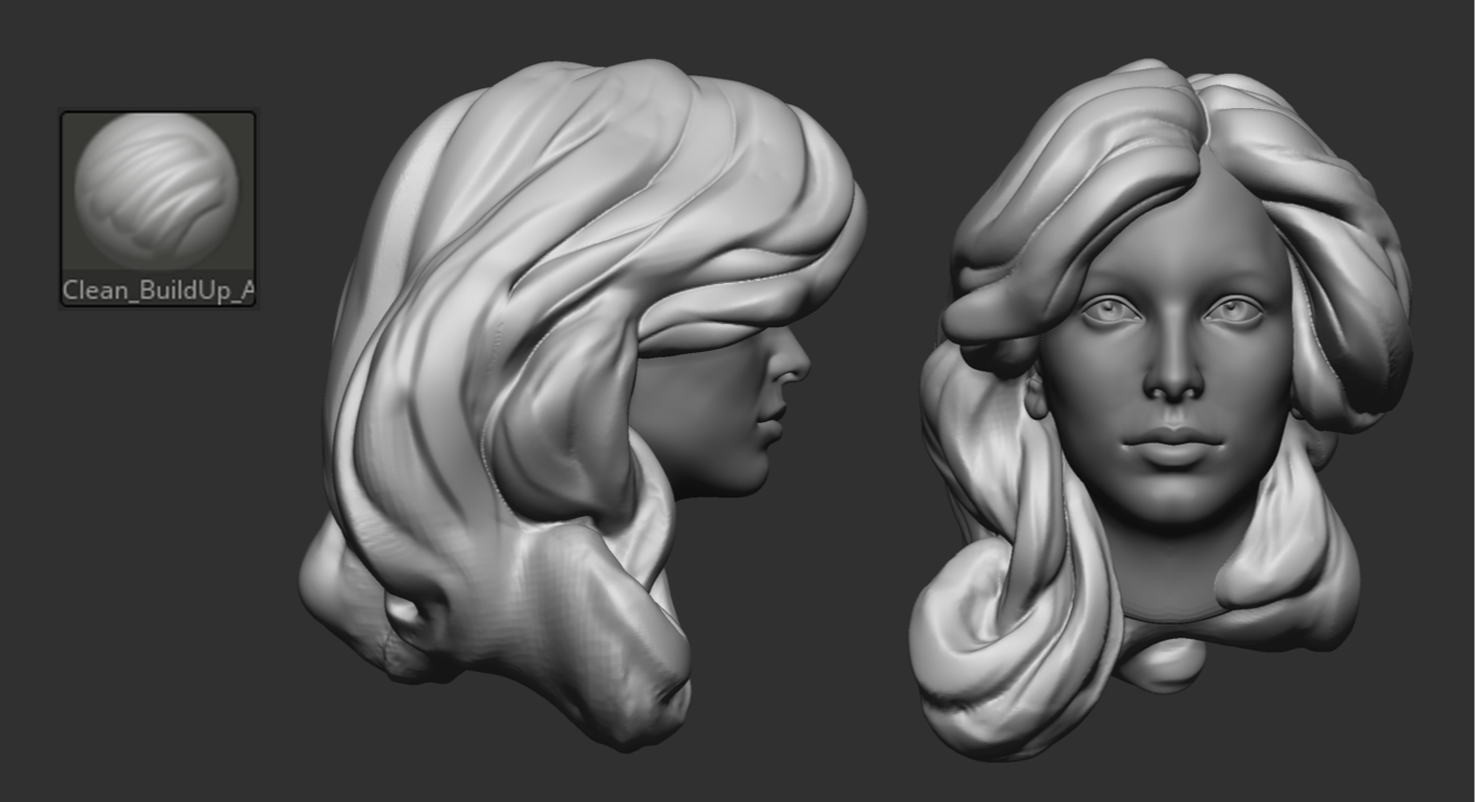
The next step is just sculpting. I use my custom clay brush (which you can find in here) but you can use any other clay brushes to block out the general flow of the hair… these are the big chunks of hair and they will help you to maintain contrast in the hair after you add the details. At this point you can increase the Dynamesh resolution to have more room to play:
After the main chunks are defined, I like to go over everything with the same brush but smaller size and do small alterations to create a more natural flow, but it is ultimately the same thing… just sculpting along the already stablished volumes:
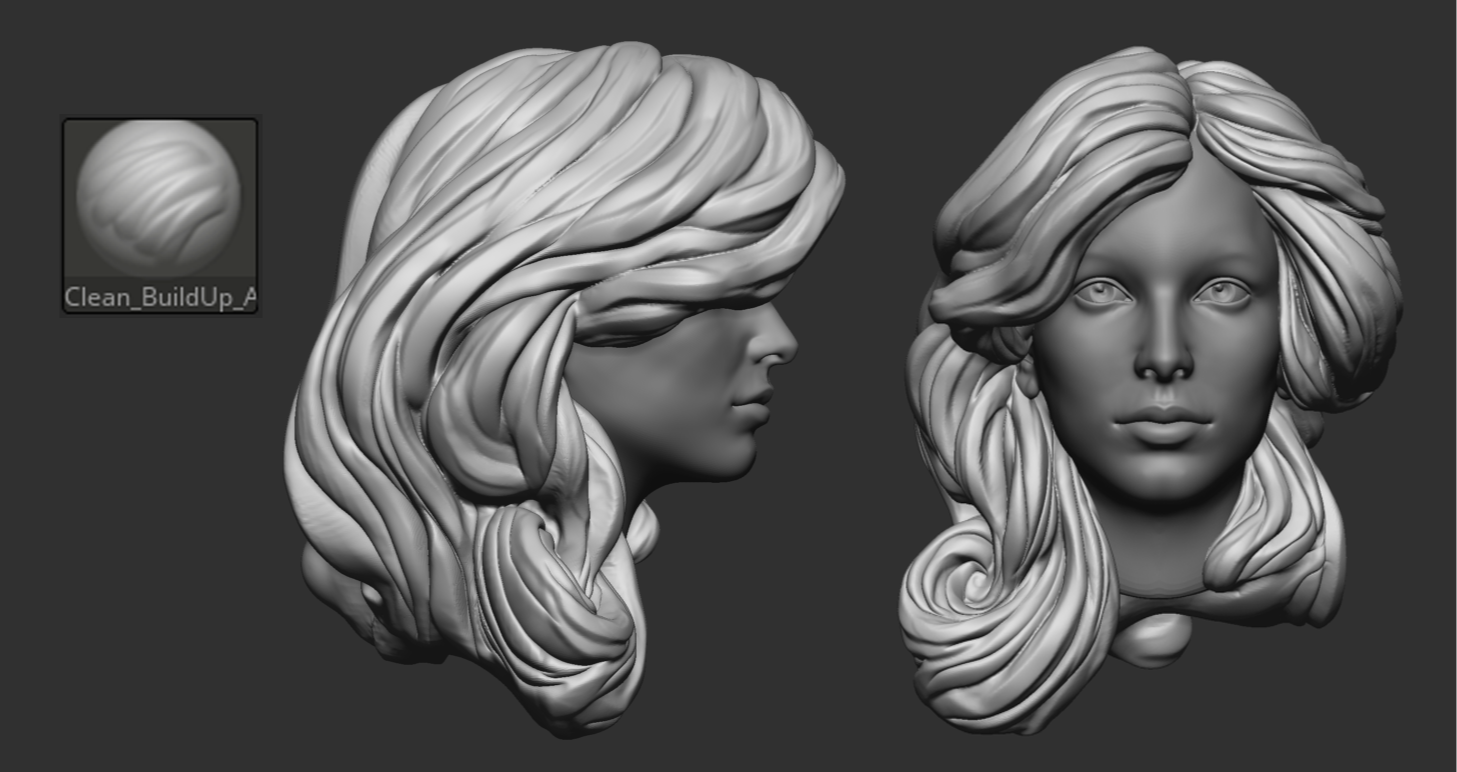
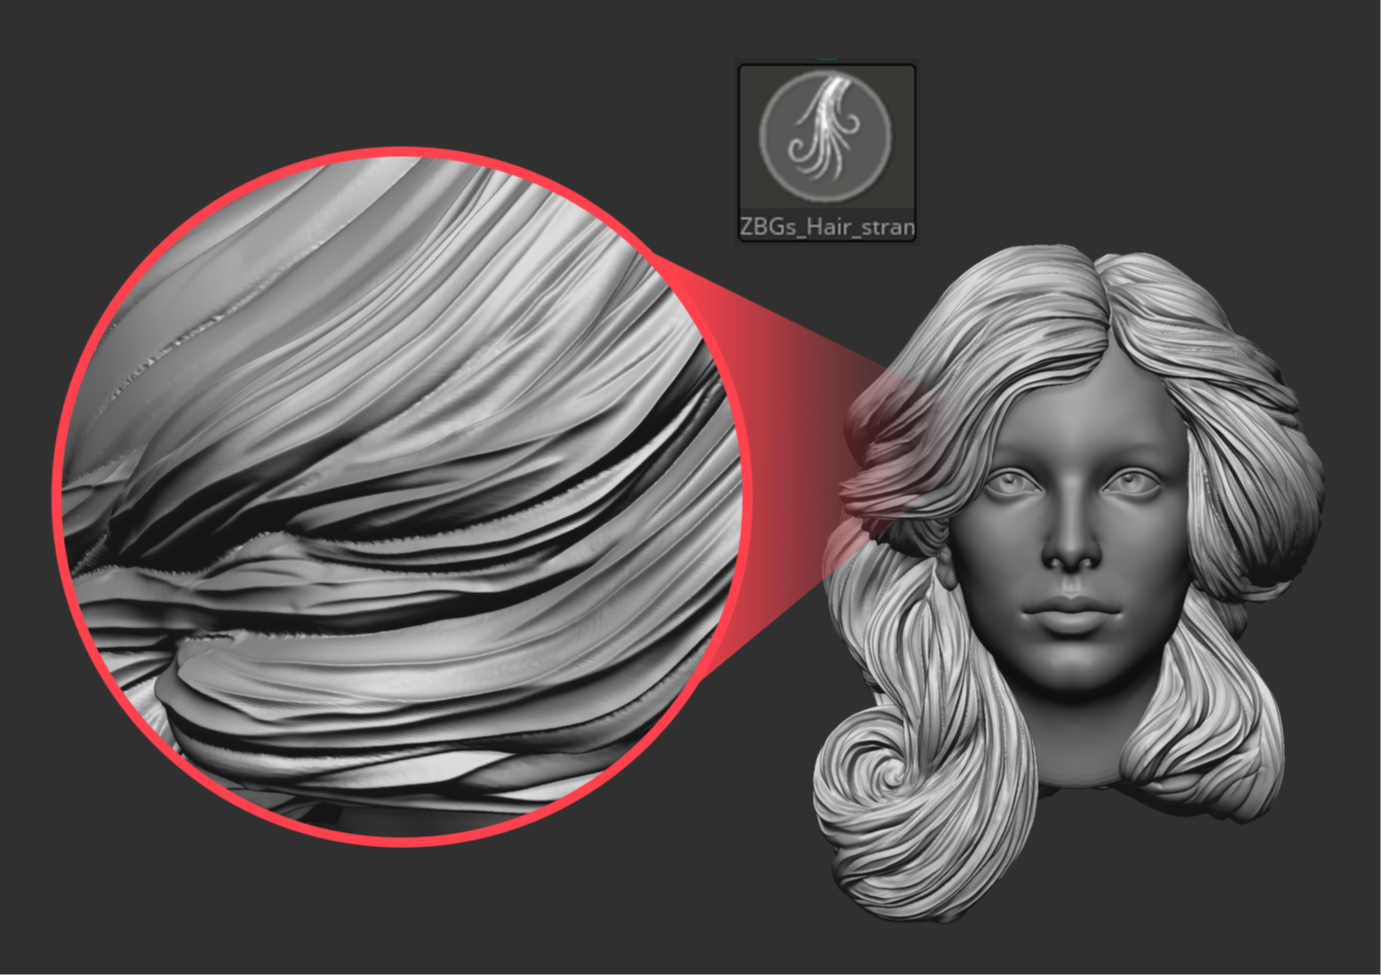
Once you are happy with the blockout, you can increase the resolution of the Dynamesh and here is where I would bring in the brushes from the ‘Stylised Hair bundle’. These brushes are for sculpting hair in ZBrush and they are free to download, here is the link.
From the pack, I used the ‘ZBGs_Hair_Strand_Sharp’ which produces a very very sharp and pinched line creating the effect of detailed hair. There is not much to the process, just continue to follow the pre-established flow but with the detailing brush:
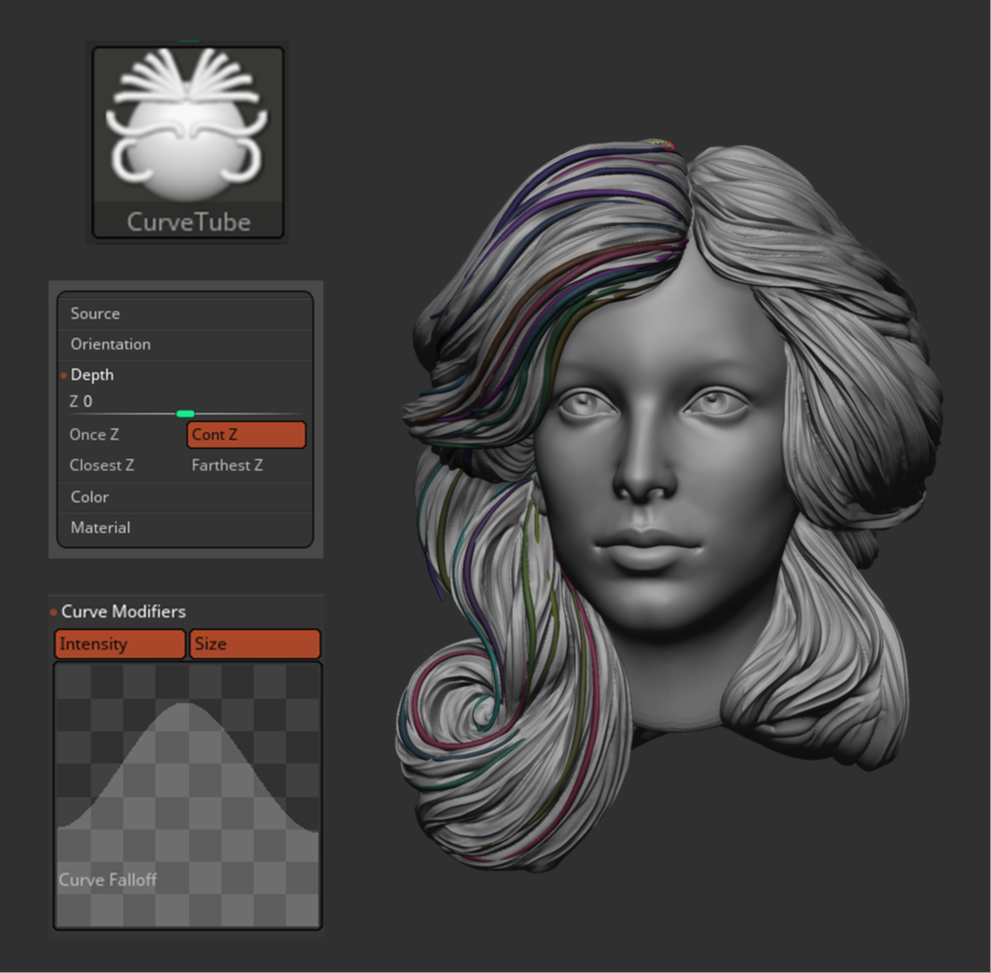
After the detailing pass is completed, you can bring in a QCube as a separate subtool and using the CurveTube brush, create a few thick strands of hair following the volume of the hair. I like to set the Depth on the Picker palette to ‘Cont Z’ so that the curves follow the surface.
You can also enable ‘size’ in the stroke palette and change the Curve Falloff to add a bit of tapering to the tube at the start and the end of the tube:
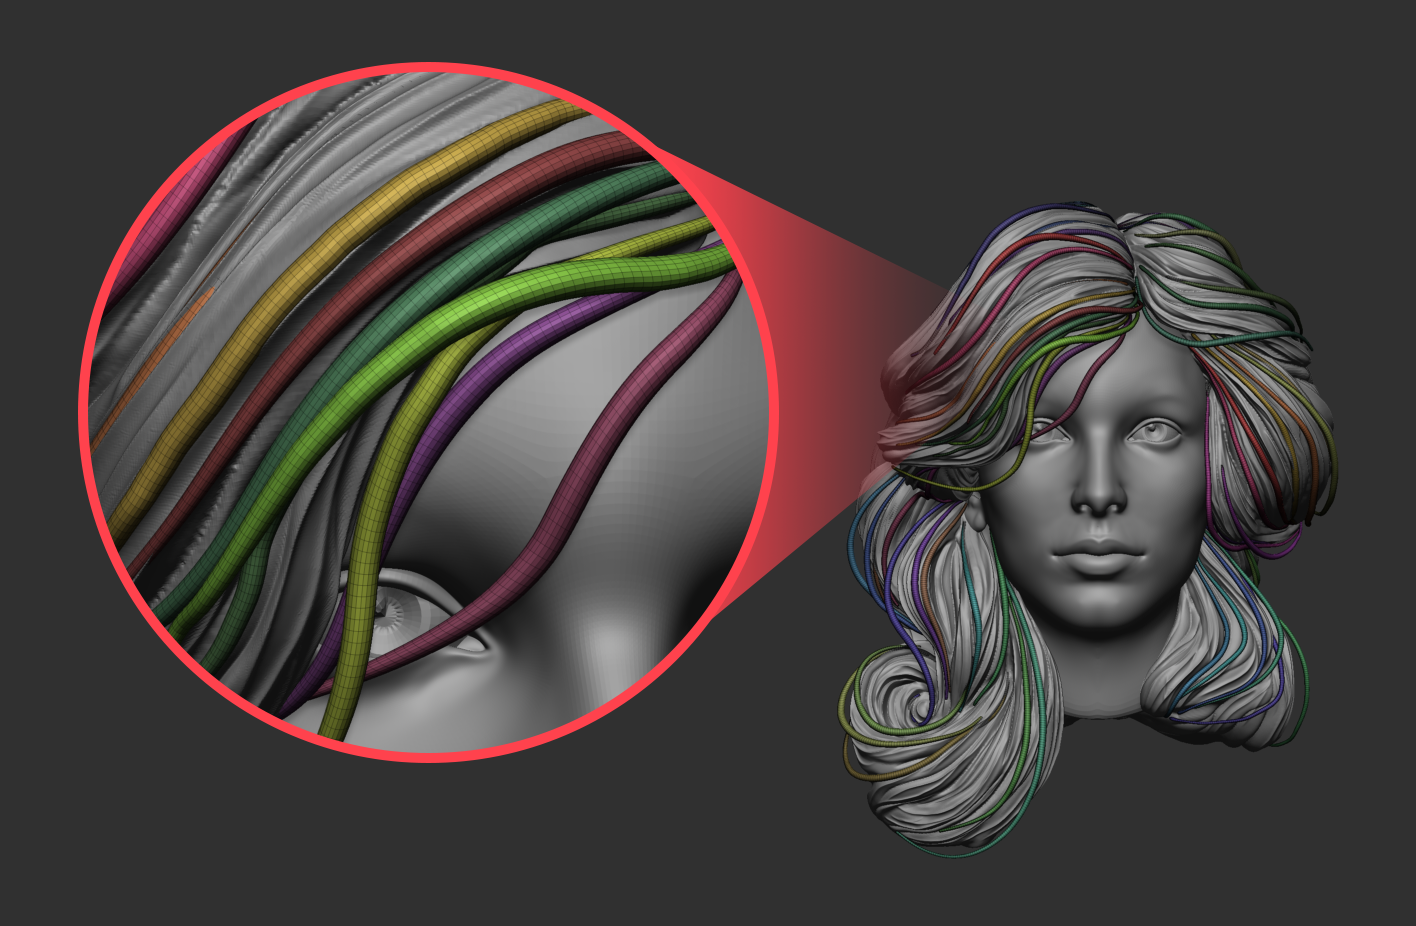
Each tube you create will have its own polygroup so after you finish placing the extra hair strands, you can use the Move topological brush (or select and hide pieces) to adjust the placement and create some negative space. This step will really help to bring the hair to life…
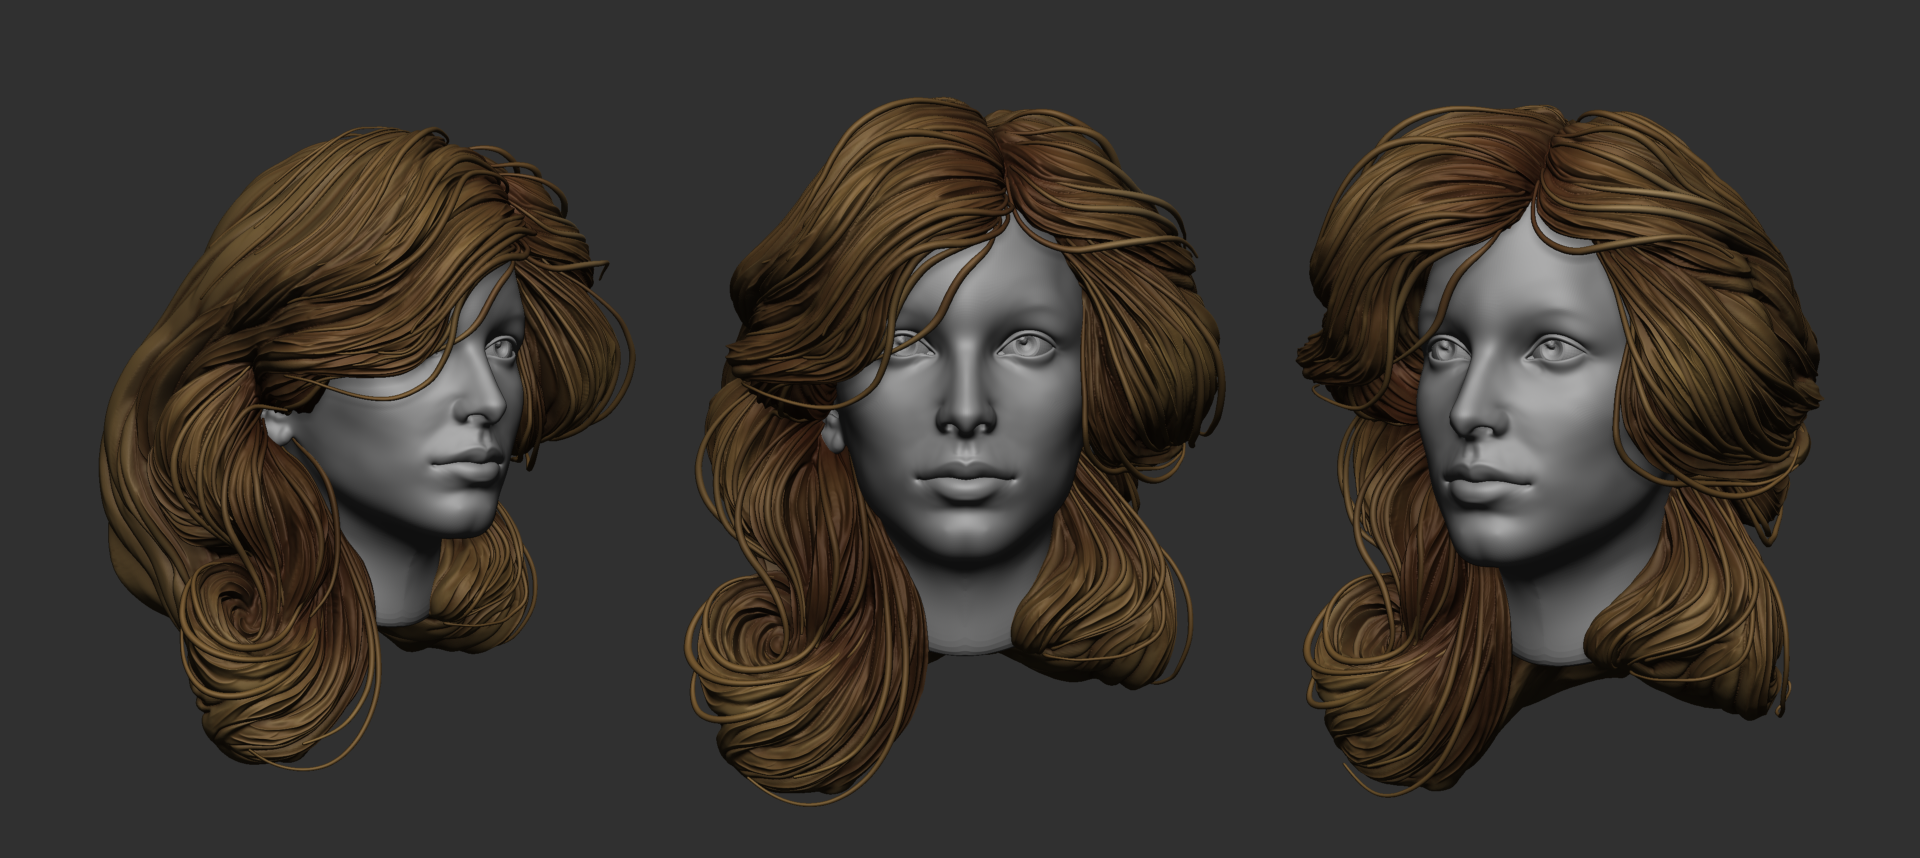
That’s about it, you can do a quick polypaint to add extra depth to the volumes just with darker colours in the polypaint:
Hope this helps and do let me know if you are planning to go to the summit, It’d be great to catch up!